|
How to Automatically Name PDF files using Win2PDF print to PDF in Windows 10 |
Scroll Prev Top Next More |
Win2PDF and Win2Image can be configured to automatically name files and skip the file save window. There are 3 ways to configure this:
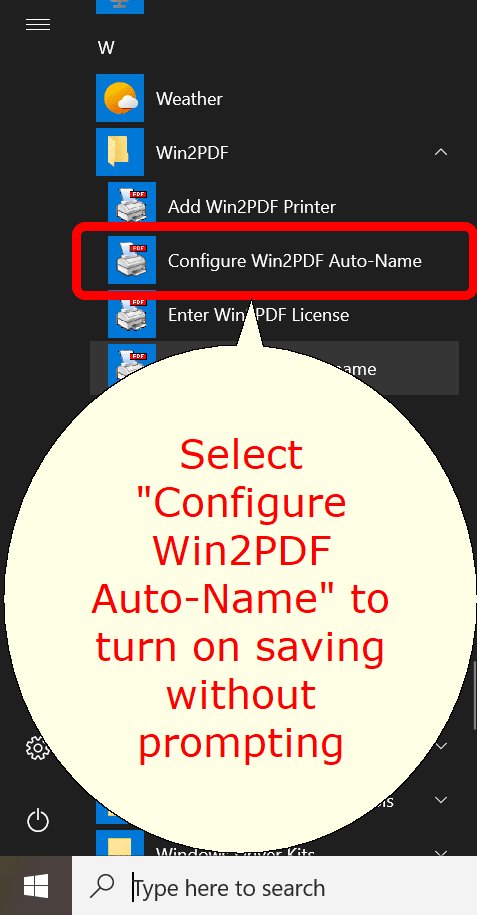
1.You can run the "Configure Win2PDF Auto-Name" shortcut from the Windows Start menu at "Start -> Win2PDF -> Configure Win2PDF Auto-Name".

Start Menu Configure Win2PDF Auto-Name
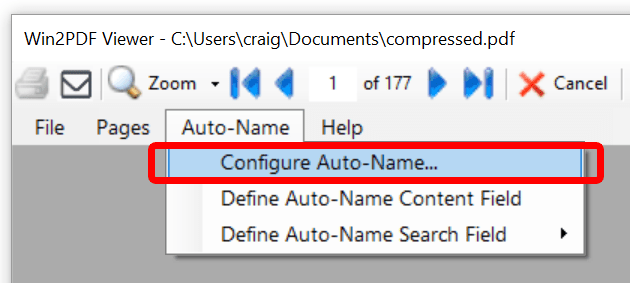
2.You can open "Configure Win2PDF Auto-Name" from the "Auto-Name" menu of the Win2PDF Desktop App.

Win2PDF Desktop Open Configure Win2PDF Auto-Name
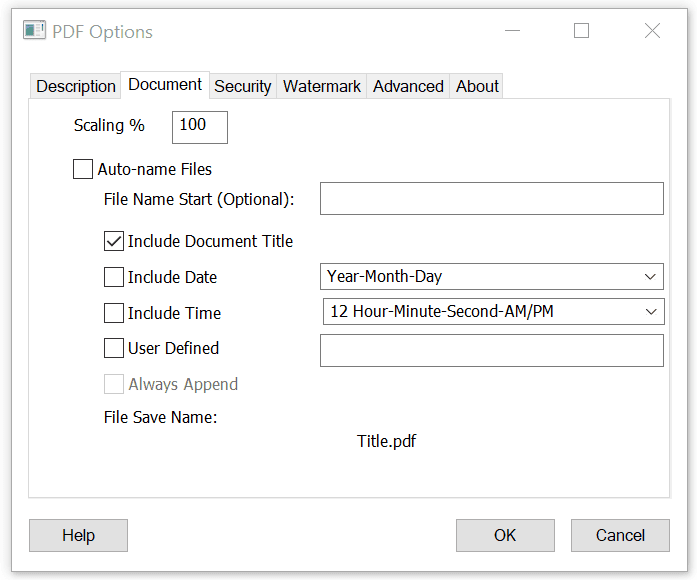
3.You can print to the Win2PDF print to pdf printer, and open the "Document" tab of PDF Options when you print to the Win2PDF printer.

Auto-name Files and Configure File Save Naming
Options 1 and 2 are best if you need to change an existing auto-name configuration, or add a new printer with auto-name enabled, use content based naming, or configure auto-name for all users. Option 3 is best if you need to enable Win2PDF Pro document security or watermark settings as part of the auto-name settings.
For more advanced methods for controlling the PDF file name, please visit the How to Manage file name settings section of the How to use the Win2PDF Admin Utility section of our online help.