The Power Automate Desktop "Print Document" action works well to convert documents to PDF with Win2PDF, but it doesn't allow you to set the file name directly. You need to configure the "Win2PDF Auto-name" feature separately before running the "flow".
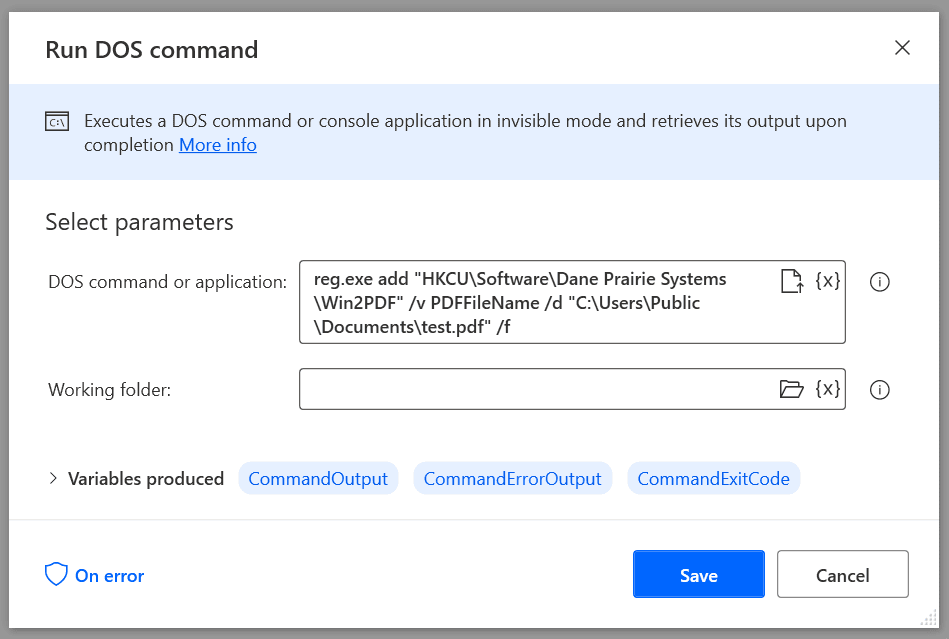
For more control, Win2PDF supports a PDFFileName registry setting for setting the file name, and this can be used in a Power Automate Desktop flow using the "reg.exe" DOS command. To set the file name, drag the "Run DOS Command" action from the "System" menu to a "flow" and enter the following command:
reg.exe add "HKCU\Software\Dane Prairie Systems\Win2PDF" /v PDFFileName /d "C:\Users\Public\Documents\test.pdf" /f
The file name path after the /d should be modified to the location and file name of the PDF, and should be enclosed with quote characters.
You can also use variables when setting the PDF file name using the "reg.exe" command. The following simple flow prompts for a document name using the Power Automate Desktop "Display select file dialog" action, and then splits the file name into directory and file name without extension variables using the "Get file path part" action. It then sets the file name to the same as the document name, but with a PDF extension before printing the document to the Win2PDF printer.
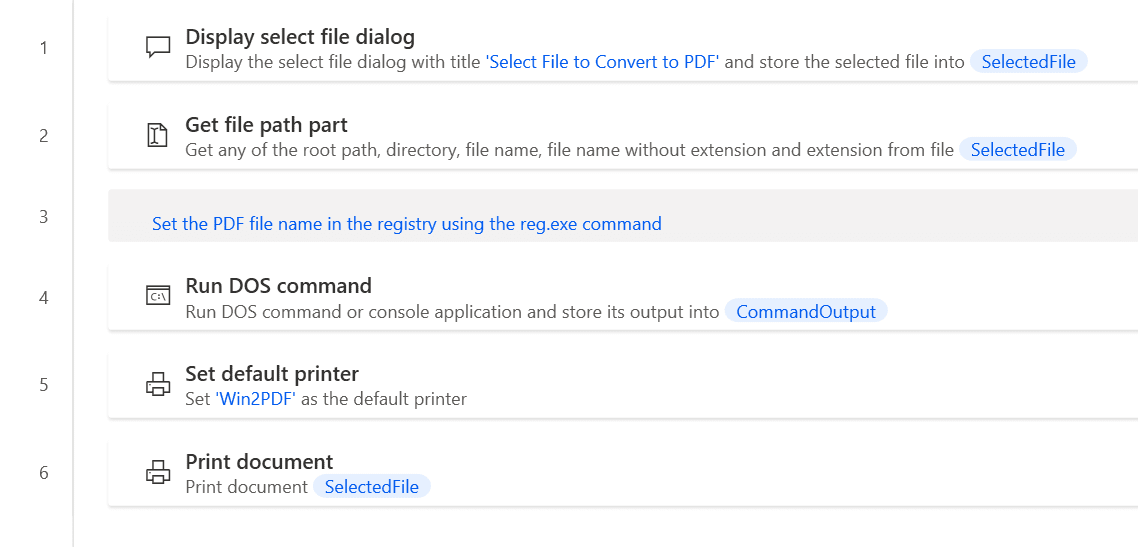
The "Run DOS Command" action to set the file name using variables is:
reg.exe add "HKCU\Software\Dane Prairie Systems\Win2PDF" /v PDFFileName /d "%Directory%\%FileNameNoExtension%.pdf" /f

To use this "flow", copy the following into a new Power Automate Desktop flow:
Display.SelectFile Title: $'''Select File to Convert to PDF''' IsTopMost: False CheckIfFileExists: True SelectedFile=> SelectedFile ButtonPressed=> ButtonPressed
File.GetPathPart File: SelectedFile RootPath=> RootPath Directory=> Directory FileName=> FileName FileNameWithoutExtension=> FileNameNoExtension Extension=> FileExtension
# Set the PDF file name in the registry using the reg.exe command
System.RunDOSCommand DOSCommandOrApplication: $'''reg.exe add \"HKCU\\Software\\Dane Prairie Systems\\Win2PDF\" /v PDFFileName /d \"%Directory%\\%FileNameNoExtension%.pdf\" /f''' StandardOutput=> CommandOutput StandardError=> CommandErrorOutput ExitCode=> CommandExitCode
System.SetDefaultPrinter PrinterName: $'''Win2PDF'''
System.PrintDocument DocumentPath: SelectedFile
If you are using the "Print document" action inside of a loop, you should wait for each document to be completed before printing the next document. You can do this by using the "PDFPostFileName" registry setting instead of "PDFFileName", and waiting for the registry value to be deleted. The following flow shows how to do this:
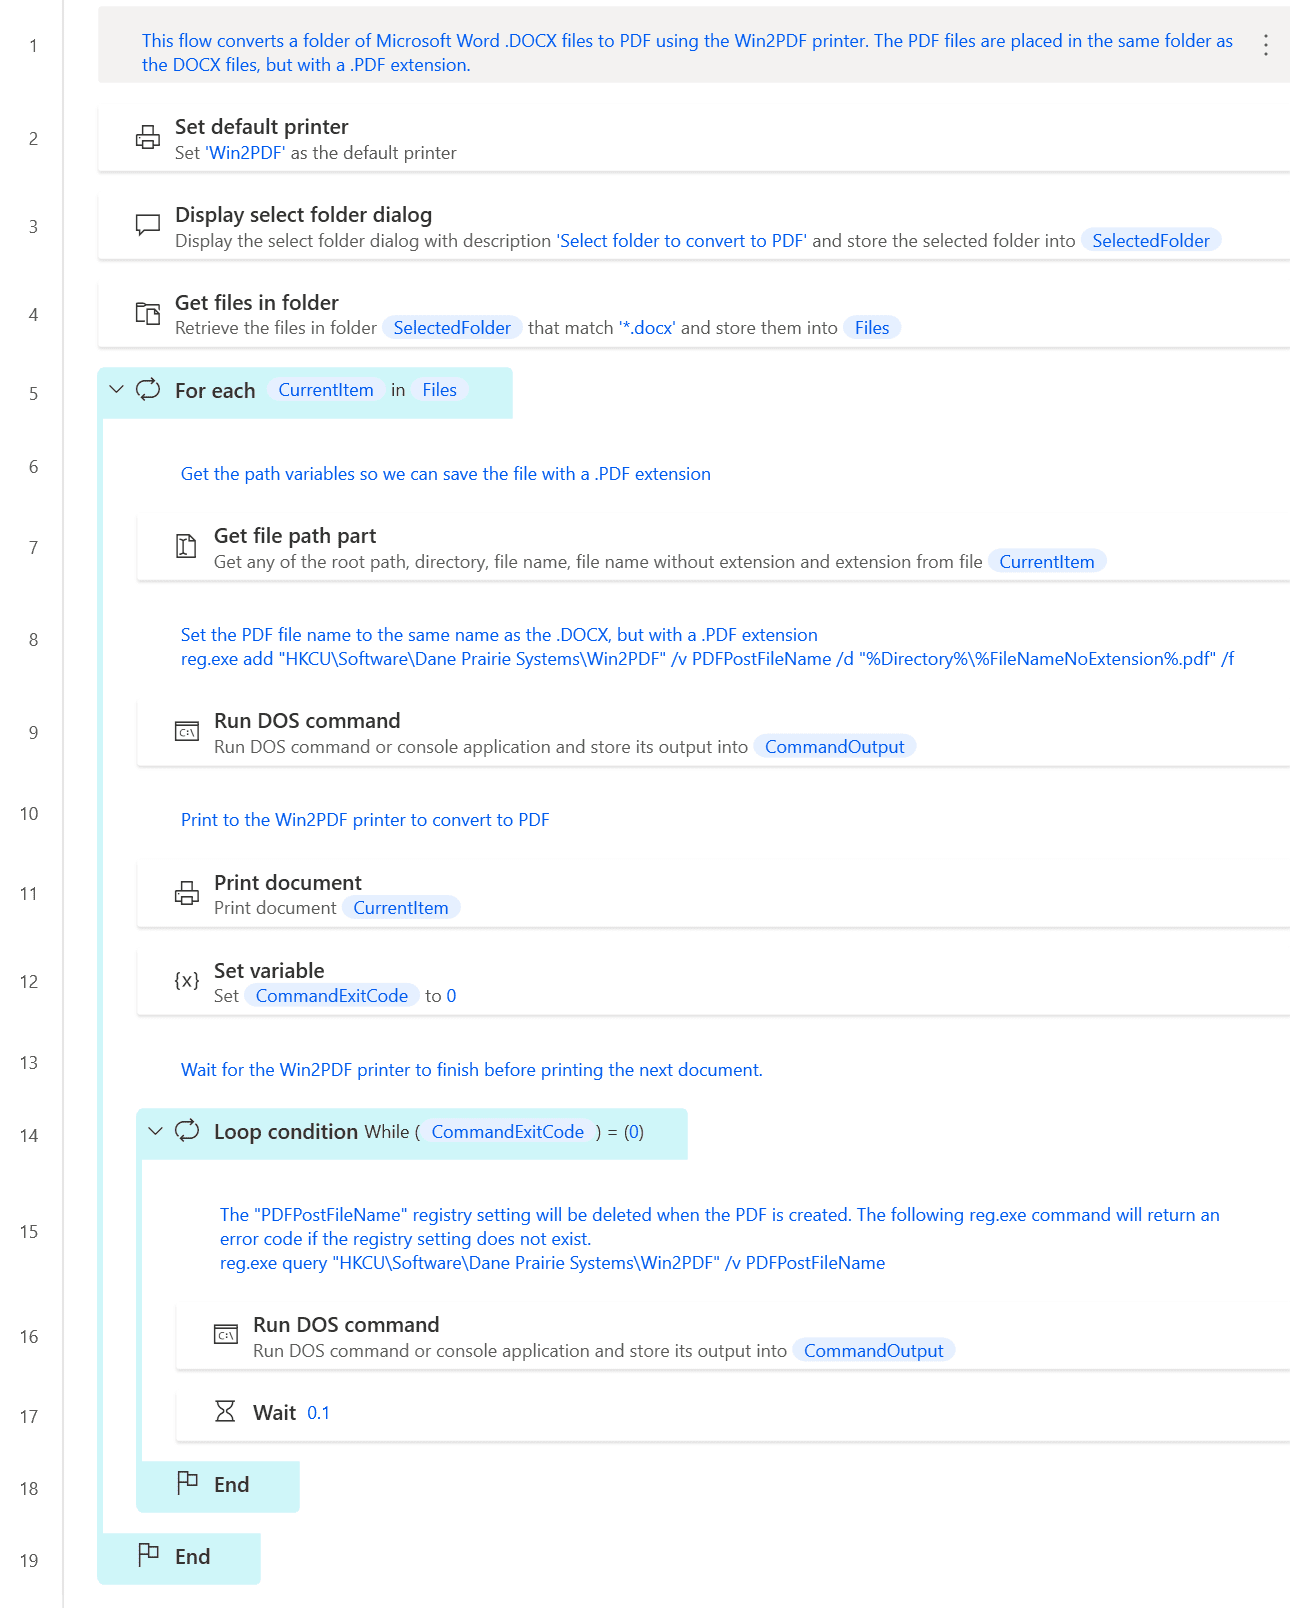
To use this "flow", copy the following into a new Power Automate Desktop flow:
# This flow converts a folder of Microsoft Word .DOCX files to PDF using the Win2PDF printer. The PDF files are placed in the same folder as the DOCX files, but with a .PDF extension.
System.SetDefaultPrinter PrinterName: $'''Win2PDF'''
Display.SelectFolder Description: $'''Select folder to convert to PDF''' IsTopMost: False SelectedFolder=> SelectedFolder ButtonPressed=> ButtonPressed
Folder.GetFiles Folder: SelectedFolder FileFilter: $'''*.docx''' IncludeSubfolders: False FailOnAccessDenied: True SortBy1: Folder.SortBy.NoSort SortDescending1: False SortBy2: Folder.SortBy.NoSort SortDescending2: False SortBy3: Folder.SortBy.NoSort SortDescending3: False Files=> Files
LOOP FOREACH CurrentItem IN Files
# Get the path variables so we can save the file with a .PDF extension
File.GetPathPart File: CurrentItem RootPath=> RootPath Directory=> Directory FileName=> FileName FileNameWithoutExtension=> FileNameNoExtension Extension=> FileExtension
/# Set the PDF file name to the same name as the .DOCX, but with a .PDF extension
reg.exe add "HKCU\Software\Dane Prairie Systems\Win2PDF" /v PDFPostFileName /d "%Directory%\%FileNameNoExtension%.pdf" /f#/
System.RunDOSCommand DOSCommandOrApplication: $'''reg.exe add \"HKCU\\Software\\Dane Prairie Systems\\Win2PDF\" /v PDFPostFileName /d \"%Directory%\\%FileNameNoExtension%.pdf\" /f''' StandardOutput=> CommandOutput StandardError=> CommandErrorOutput ExitCode=> CommandExitCode
# Print to the Win2PDF printer to convert to PDF
System.PrintDocument DocumentPath: CurrentItem
SET CommandExitCode TO 0
# Wait for the Win2PDF printer to finish before printing the next document.
LOOP WHILE (CommandExitCode) = (0)
/# The "PDFPostFileName" registry setting will be deleted when the PDF is created. The following reg.exe command will return an error code if the registry setting does not exist.
reg.exe query "HKCU\Software\Dane Prairie Systems\Win2PDF" /v PDFPostFileName#/
System.RunDOSCommand DOSCommandOrApplication: $'''reg.exe query \"HKCU\\Software\\Dane Prairie Systems\\Win2PDF\" /v PDFPostFileName''' StandardOutput=> CommandOutput StandardError=> CommandErrorOutput ExitCode=> CommandExitCode
WAIT 0.1
END
END