|
How to automatically name PDF files created with Microsoft Print To PDF in Windows 10 |
Scroll Prev Top Next More |
The Microsoft Print to PDF printer does not have an ability to automatically name PDF files. The user must manually enter in a name for each document they print.
The Win2PDF Print to PDF printer can be configured to set the default file name that is shown in the file save window. It can also be configured to automatically name files and skip the file save window.
Win2PDF and Win2Image can be configured to automatically name files and skip the file save window. There are 3 ways to configure this:
1.You can run the "Configure Win2PDF Auto-Name" shortcut from the Windows Start menu.

Start Menu Configure Win2PDF Auto-Name
2.You can open "Configure Win2PDF Auto-Name" from the "Auto-Name" menu of the Win2PDF Desktop App.

Win2PDF Desktop Open Configure Win2PDF Auto-Name
3.You can print to the Win2PDF printer, and open the "Document" tab of PDF Options when you print to the Win2PDF printer.
Options 1 and 2 will display the following window:

Win2PDF Desktop Configure Auto-Name
Checking the "Auto-name Files" option enables the auto-name feature for the printer selected under "Printer Name". To turn off the auto-name feature and configure Win2PDF to display a file save window, un-check the "Auto-name Files" option.
You can configure the naming options by checking options. The "File Save Name" preview will automatically update as you enable and disable options to show an example file name.
The available naming options are:
Auto-name: Include Document Title
Auto-name: Include Content Field
Auto-name: Include Search Field
If you previously configured Auto-Name through the "Document" tab of PDF Options, the settings will be reflected in the Configure Win2PDF Auto-Name window.
The auto-name configuration is stopped if you hold down the shift key while printing to the Win2PDF printer. If you are printing to Win2PDF in the background while typing in another program, you may accidentally stop the auto-name if you press the shift key. If you want to prevent this from happening, you can use the Win2PDF Admin Utility "Troubleshooting" option to "Disable Auto-Name Shift Key check".
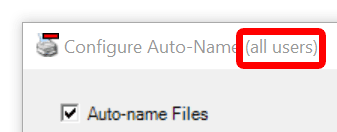
The auto-name settings in this window only apply to the currently logged in user. Administrators can enable Auto-Name for all users by right clicking on the "Configure Auto-Name" shortcut and select "Run As Administrator".

Configure Win2PDF Auto-name for all users
The "Configure Win2PDF Auto-Name" window title should display "all users".